So if you keep encountering spotty video feeds with loads of constant buffering, working your way through the list of fixes below should help you fix that.
Check Server Status
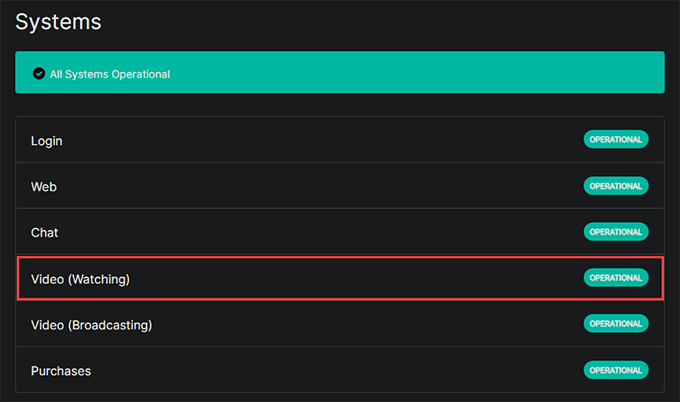
If Twitch worked fine just a moment ago, you might be dealing with issues on the server side. You can rule that out by heading over to the Twitch Status page. Should you notice any problems listed next to Video (Watching), there’s nothing you can do but wait until Twitch sorts things out.
Lower the Quality
If you’re attempting to stream video at a higher resolution, that may end up causing issues due to network congestion and speed limitations. Try lowering the quality of the feed to a sub-HD resolution such as 480p or lower. Use the cog-shaped Settings icon to the lower-right of the video pane and select Quality to change video quality.
Restart Browser/App/PC
If Twitch continues to buffer, it’s a good idea to restart your browser, the Twitch app, or your PC. In most cases, that should help fix any minor bugs and glitches preventing Twitch from loading video content normally.
Check Internet Connection
Try running a speed test on your computer using an online service such as Speedtest.net, TestMy.net, or Fast.com. If you notice slow internet in general, start by soft-resetting your Wi-Fi router. If the issue persists, connect via Ethernet (if possible) or switch to a different Wi-Fi network.
Flush DNS (Domain Name System) Cache
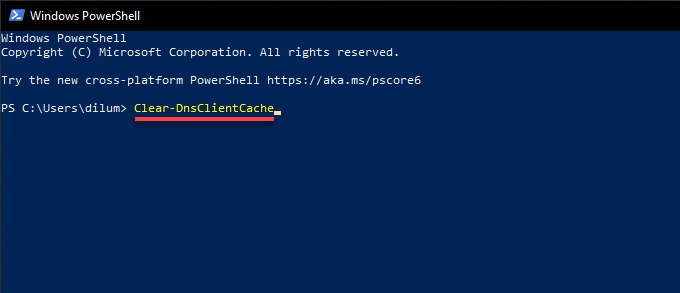
Flushing the DNS cache might help your PC re-establish contact with the Twitch servers. Here’s how to do that:
- Press Windows + X and select Windows PowerShell (Admin).
- Type the following command: Clear-DnsClientCache
- Press Enter.
Stop Bandwidth-Guzzlers
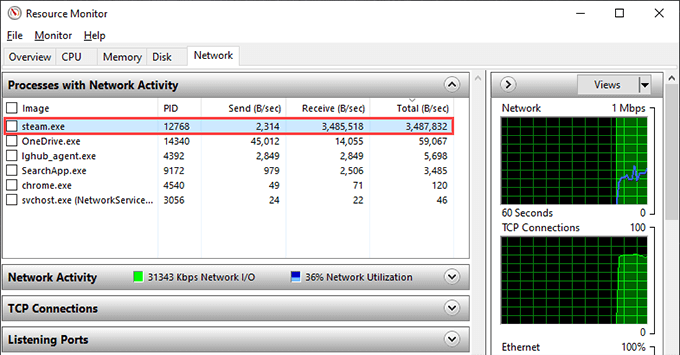
If you have any other apps with active downloads, that may adversely impact Twitch’s ability to stream video without running into buffering issues. Try pausing them. Should you have trouble identifying apps with excessive network usage, you can use the Resource Monitor on your PC to help you with that.
- Right-click the taskbar and select Task Manager.
- Select More details, switch to the Performance tab, and select Open Resource Monitor.
- Switch to the Network tab to view network activity by app.
Change DNS (Domain Name Service)
If the issue persists, it’s a good idea to change the DNS (Domain Name Service) servers for your internet connection. Using a popular DNS service—Google DNS is a great choice—might make the difference in helping your computer figure out the best servers for Twitch streaming.
- Open the Start menu and select Settings > Network & Internet > Wi-Fi or Ethernet.
- Select Properties under your internet connection.
- Select Edit under IP settings.
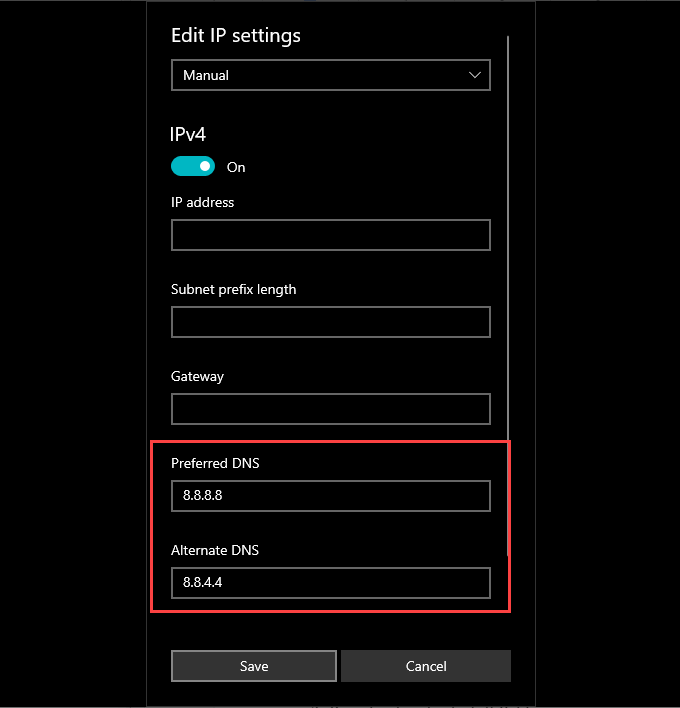
- Set Edit IP Settings to Manual and turn on the IPv4 switch.
- Enter the following into the Preferred DNS and Alternate DNS fields and select Save: 8.8.8.8 8.8.4.4
Disable VPN
VPN (Virtual Private Network) services are excellent for privacy, but they aren’t the best at network performance. If you use one, disabling it might help Twitch stream without buffering again.
Delete Browser Cache
If you’re streaming Twitch over a web browser, an obsolete web cache can prevent it from working correctly. Here’s how to delete the browser cache on three popular browsers—Chrome, Firefox, and Edge.
Google Chrome
- Open the Chrome menu and select Settings.
- Select Privacy and security.
- Select Clear browsing data.
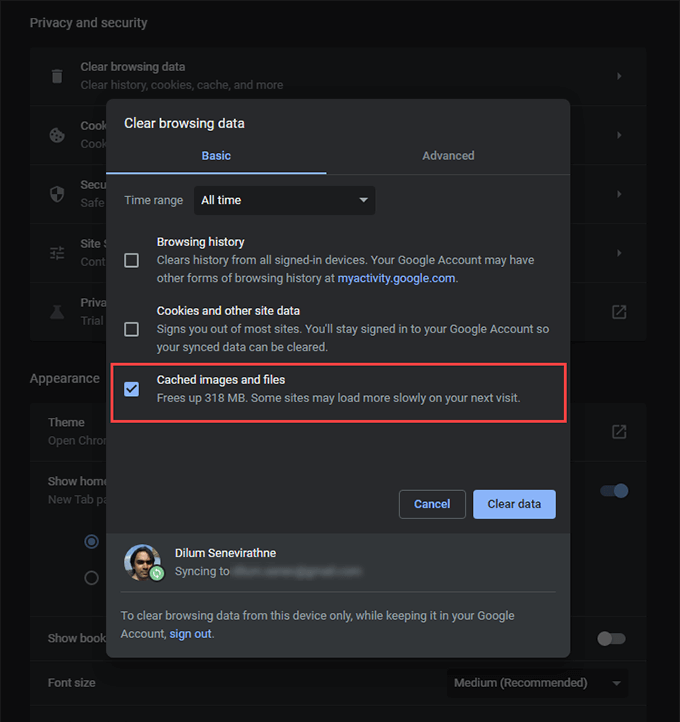
- Set Time range to All time.
- Select the box next to Cached images and files.
- Select Clear data.
Mozilla Firefox
- Open the Firefox menu and select Settings.
- Select Privacy and security.
- Select Clear Data under Cookies and Site Data.
- Check the box next to Cached Web Content.
- Select Clear.
Microsoft Edge
- Open the Edge menu and select Settings.
- Select Privacy, search, and services on the sidebar.
- Select Choose what to clear under Clear browsing data.
- Set Time range to All time.
- Check the box next to Cached images and files and select Clear now.
Disable Browser Extensions
Browser extensions can create conflicts with the Twitch web app and stop it from streaming correctly. Disable all add-ons and check if that resolves the issue.
Google Chrome
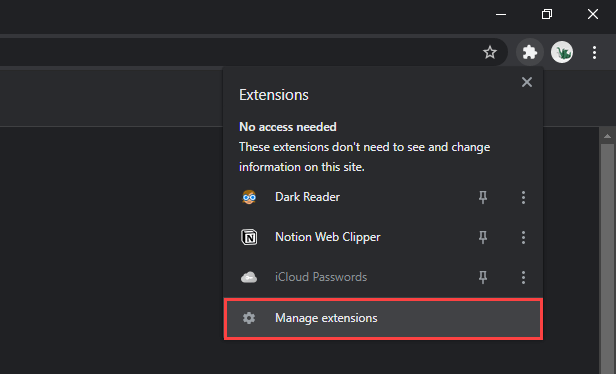
Select the Extensions icon to the top-right of the Chrome window and select Manage extensions. Then, turn off all the switches on the screen that follows.
Mozilla Firefox
Open the Firefox menu and choose the Add-ons and Themes option. Then, turn off all switches on the screen that follows.
Microsoft Edge
Open the Edge menu, select Extensions, and turn off the switches next to all active extensions.
Update Browser
Your browser itself may have issues that prevent Twitch from streaming as usual. Try applying any pending updates and see if that helps. Here’s how to do that on Chrome, Firefox, and Edge:
Google Chrome
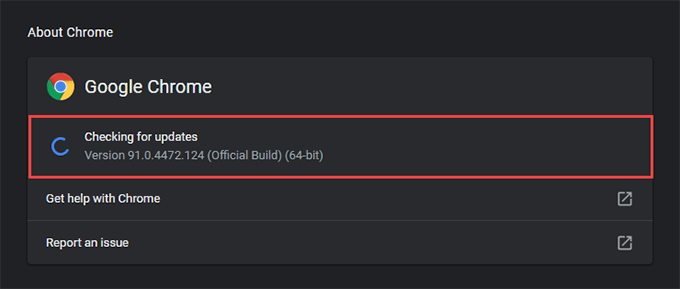
Open the Chrome menu, point to Help, and select About Google Chrome.
Mozilla Firefox
Open the Firefox menu, point to Help, and select About Firefox.
Microsoft Edge
Open the Edge menu, point to Help and feedback, and select About Microsoft Edge.
Switch to the Twitch App
If you keep experiencing issues with buffering while streaming Twitch on your web browser, switch to using the Twitch app for PC and check if that makes a difference. It’s strikingly similar to Twitch’s web app version, and you can start watching as soon as you sign in with your existing Twitch user credentials. If you already use the Twitch app, try updating it. To do that, open the Twitch menu (select the three-stacked lines to the top-left of the window), point to Help, and select Check for Updates.
Disable/Enable Hardware Acceleration
Hardware acceleration helps speed up performance while streaming videos over Twitch. But sometimes, it can also hurt performance. Disabling the functionality can help. Conversely, you may want to re-enable hardware acceleration if you’ve disabled it previously.
Google Chrome
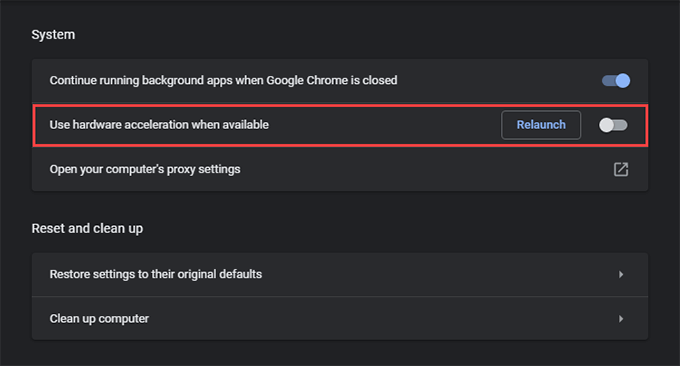
- Open the Chrome menu and select Settings.
- Select Advanced > System on the sidebar.
- Turn on Hardware acceleration when available and select Relaunch.
Mozilla Firefox
- Open the Firefox menu and select Settings.
- Scroll down the General tab until you get to the Performance section.
- Uncheck the box next to Use recommended performance settings. Follow that by unchecking Use hardware acceleration when available.
Microsoft Edge
- Open the Edge menu and select Settings.
- Select System on the sidebar.
- Turn off the switch next to Use hardware acceleration when available and select Restart.
Twitch App
- Select your profile portrait and choose Settings.
- Select the General tab.
- Turn on the switch next to Software Rendering Mode.
Twitch Has Stopped Buffering
The fixes above should’ve helped you fix Twitch’s constant buffering on your PC. If the same problem occurs again, don’t forget to work your way quickly through some of the more straightforward solutions above. Clearing the DNS cache, getting rid of the cached browsing data, or stopping network-intensive programs should almost always help you get Twitch working properly again.
