The default folders I’m talking about are Downloads, Documents, Videos, Music, etc. By default, all of these folders are located on the same partition as your system partition, which is usually C. The path is normally C:\Users\username\foldername. If you need extra space on your main partition for applications or something else, then it’s not very difficult to move those default folders to a new location. What’s nice is that you can move just one or all of them as needed. So if your Videos folder is the only large folder taking up space, you can move it and leave the other folders alone. I also recommend moving your data folders to another disk (specifically a second hard drive, not just a different partition on the same disk) if you can as they will be safe in case the system drive fails or Windows becomes corrupt and inaccessible.
Change User Folder Location in Windows
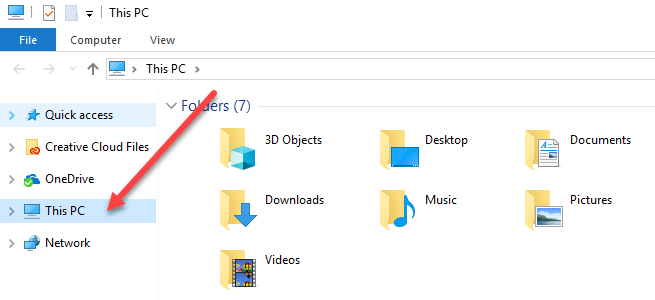
The procedure below is pretty much the same for Windows 10, Windows 8, Windows 7, Windows Vista, etc, etc. There are a few features of Windows that have remained the same over decades and the location of user folders is one of them. To get started, open Windows Explorer and navigate to the directory that has all of the system folders. In Windows 8 and Windows 10, you just click on This PC and you’ll see everything.
In Windows 7, you’ll have to manually navigate to the user folder directory by going to C:\Users\username. By default, Windows 7 will show libraries in the left-hand pane, which are more like virtual folders that contain the contents of multiple folders. You can also change the libraries locations, which I will explain below later.
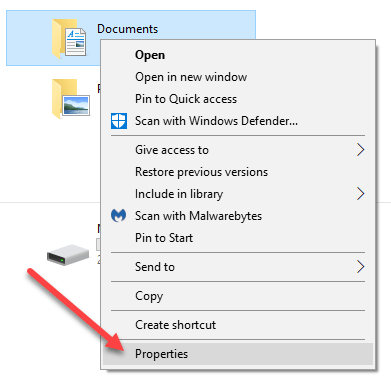
Now just right-click on the folder you wish to move and choose Properties.
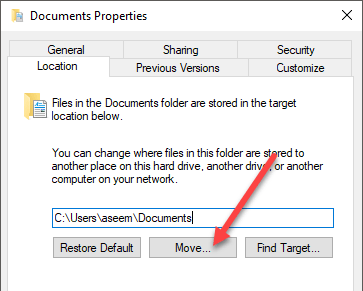
Click on the Location tab and click on the Move button. You should also see the current path to the folder in question.
The Find Target button doesn’t do anything other than load the path listed in the text box. So if you were to close the Explorer window behind the folder properties dialog and click on Find Target, it would just bring up an Explorer window in the parent folder of the last folder in the path (in my case, the parent folder of Documents).
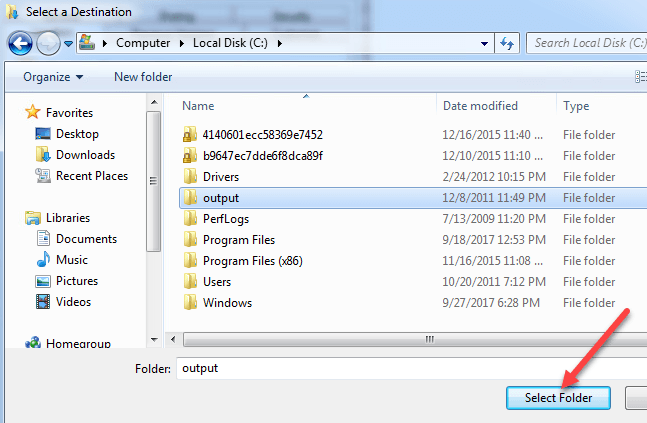
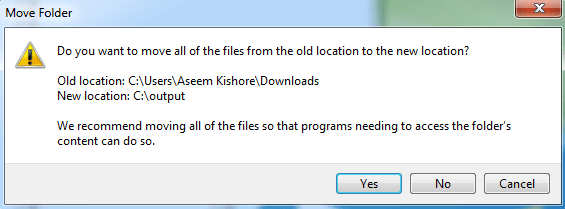
When you click on Move, it will bring up a dialog where you can select the new destination folder as shown above. Once you select the folder and click OK or Apply on the properties dialog, it will ask if you want to move all the files or not.
It is always recommended that you move all the files to the new location. When you click Yes, Windows will begin moving the files to the new location. It could take some time, depending on how much data is in the folder. That’s about it! At this point, the folder will be accessible through programs normally, but the data will be saved in the new location rather than the default location. For example, if you change the location of the Downloads folder, your browsers will automatically download files to that folder, which will now be redirected to the new location. I don’t recommend changing the new location to an external USB drive or a network drive as those tend to get disconnected occasionally and will start causing strange issues in Windows. It’s better to only do this if you have an additional disk in your system that is always connected. Enjoy!
